HOW TO
Change your SSID & Password
Step by Step
Step 1 : Connect to the Router
1.1. | Connect your computer or mobile device to the Cudy router via Wi-Fi or using an Ethernet cable.
1.2. | The WIFI name and password can be found on the bottom of the router.
Step 2 : Access the Router’s Web Interface
2.1. | Open a web browser (e.g., Chrome, Firefox, etc.).
2.2. | In the address bar, type the router’s default IP address: 192.168.10.1
2.3. | Press Enter.
Step 3 : Log in to the Router’s Admin Page
You should see a login page. Enter the default username and password:
○ Username: admin
○ Password: admin
(If these have been changed before, use your custom credentials. Otherwise, reset the router to factory settings if you don’t remember the login.)

Step 4 : Navigate to the Wireless Settings
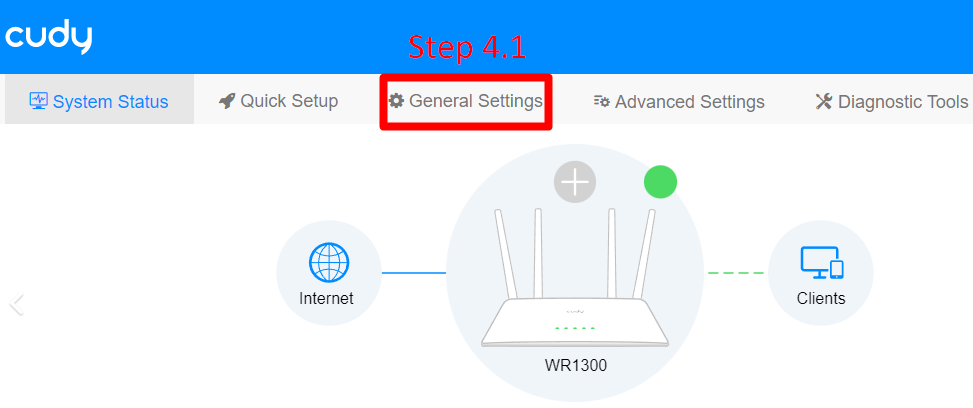
4.1. | Once logged in, look for the Wireless or Wi-Fi settings, which can be found under the General Settings tab at the top of the screen.

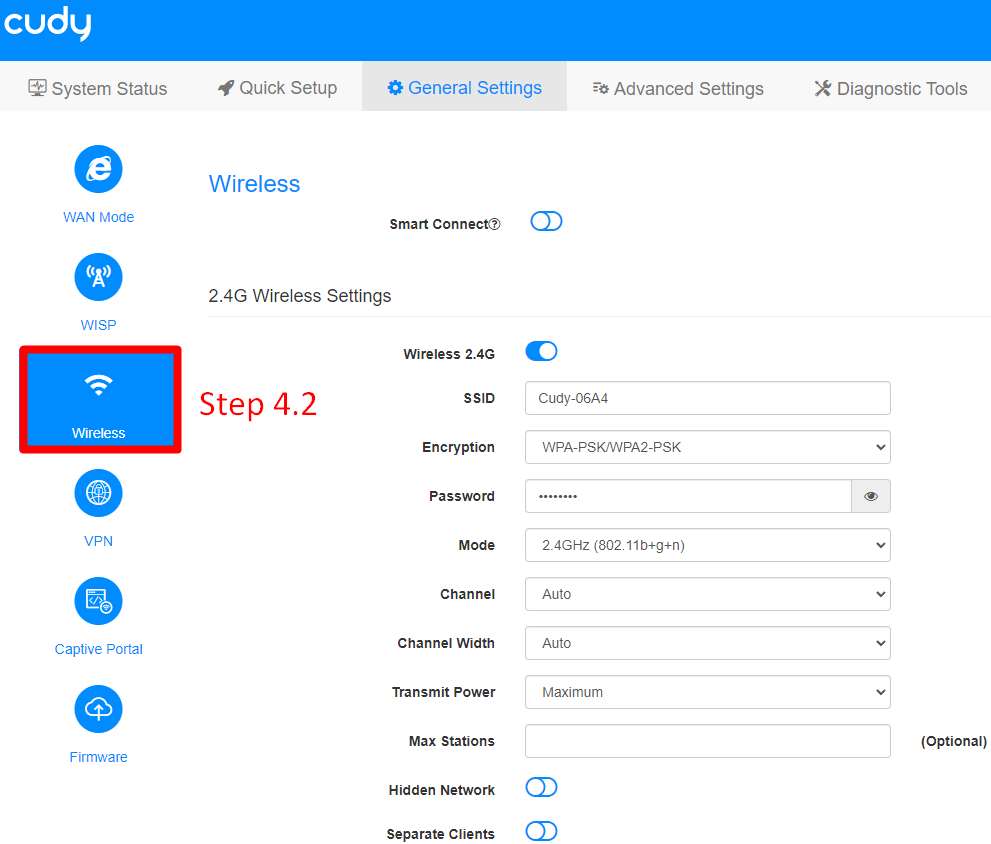
4.2. | On the side menu select Wireless.

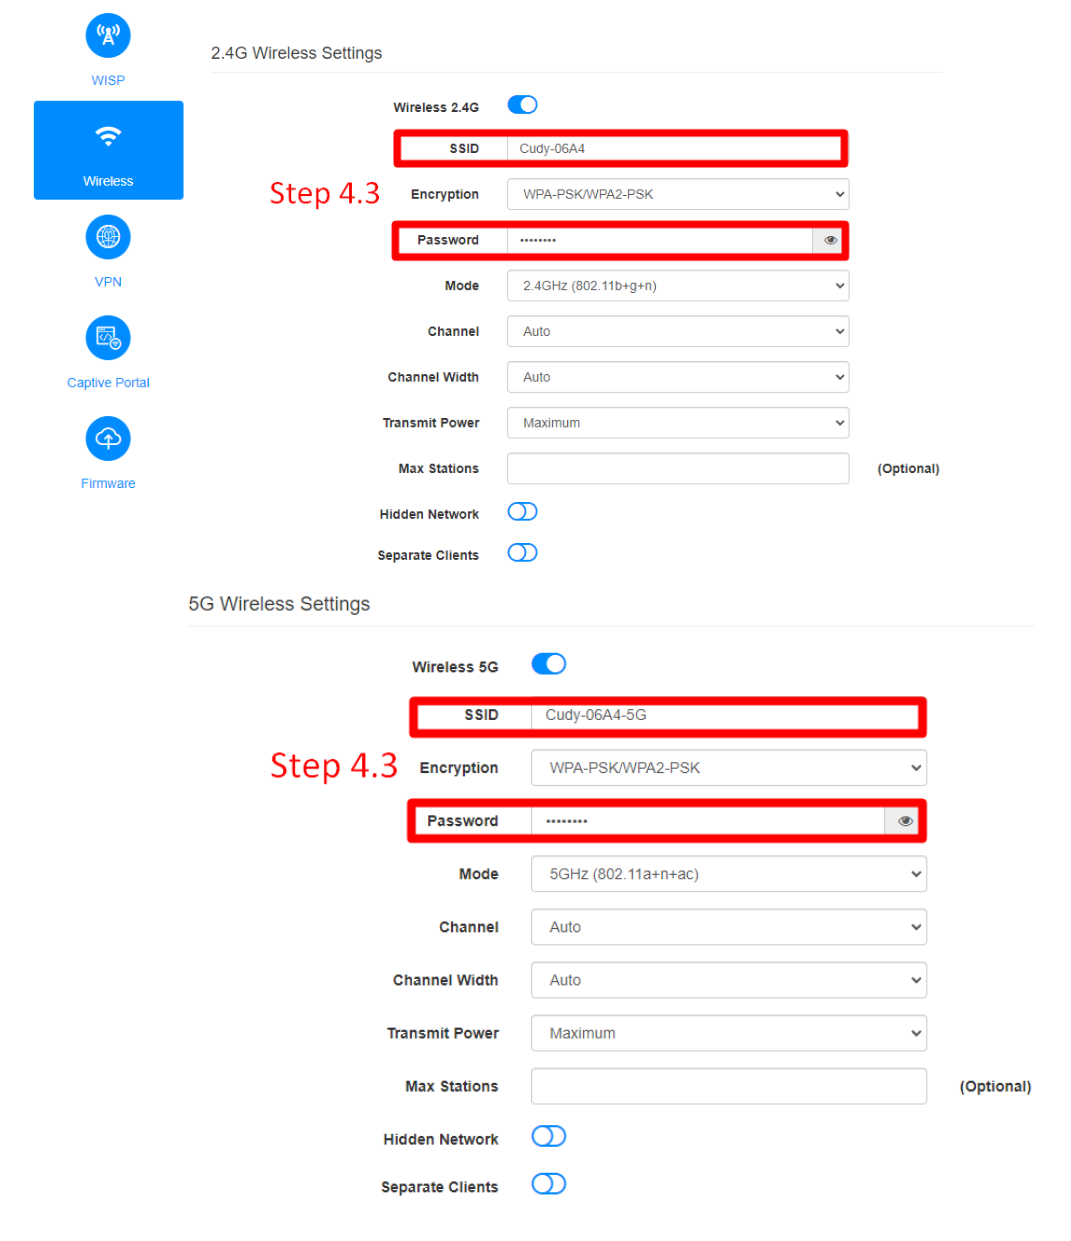
4.3. | Continue to change the SSID and Password on both the 2.4G Wireless Settings and the 5G Wireless Settings.

Step 5 : Save the New Settings
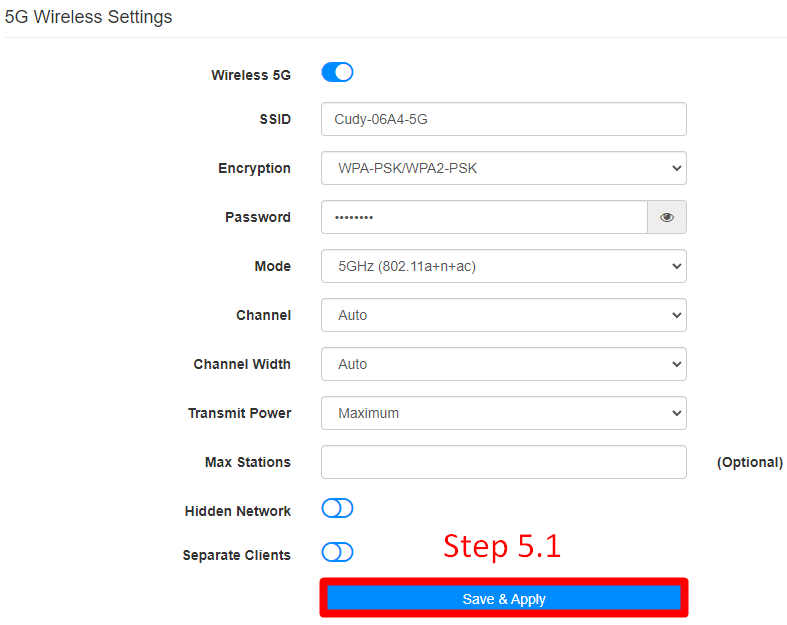
5.1. | After making changes, click Save & Apply at the bottom of the page
.
5.2. | Your router may restart, and you will need to reconnect your devices to the new Wi-Fi
network using the updated credentials.
Step 6 : Reconnect Your Devices
After the router applies the changes, you may need to reconnect your computer or phone to the new Wi-Fi network using the updated SSID and password.
If the changes do not take effect immediately, restarting the router manually might help.
 ... Luna is Loading ...
